Note: I don’t know if this is useful for any mouse except for mine (Anker Vertical Mouse). I’m posting this partially because it might be useful to someone else and partially because I’m trying to spam the site post something every day after being pre-inspired by Inkhaven4.
I used to get carpel tunnel symptoms5 while working on a computer all day, and the thing that finally solved it was a vertical mouse. Unfortunately, there’s only a couple options, and the one I like best61 has an annoying issue where the wheel wears out after a year or so. It’s cheap enough that this wasn’t a huge deal, but I finally got around to trying to fix it and realized it’s stupidly easy.
The Problem
It turns out the problem isn’t with the wheel itself. The problem is that the rubber around the wheel isn’t attached, and it stretches out over time. This messes up the friction against the inexplicably-smooth inner part of the wheel and causes it to slide7.

Nothing is actually wrong with the wheel mechanism; we’re just not actually moving it.
The Solution
This suggests a few solutions:
- Add something between the rubber and the metal to increase tension.
- Add something between the rubber and the metal to increase adhesion.

My first thought was to shove a cut-up rubber-band under the wheel, but that ended up being too bulky and made the rubber catch when turning the wheel. My second idea was adhesive putty for hanging posters92. This is actually perfect, since I can control exactly how much I use, and it’s not just high-friction — it’s an actual adhesive3. This particular putty is also allegedly removable in case it causes problems.
I expect that some sort of glue would also work, but it would be much messier, and you’d need to pick a glue that adheres well to rubber and metal.
The Process
The rubber isn’t actually attached (that’s the problem), so it’s easy to peel up. I just formed a really tiny string of putty, peeled the wheel up on one side, jammed putty in, turned the wheel and repeated.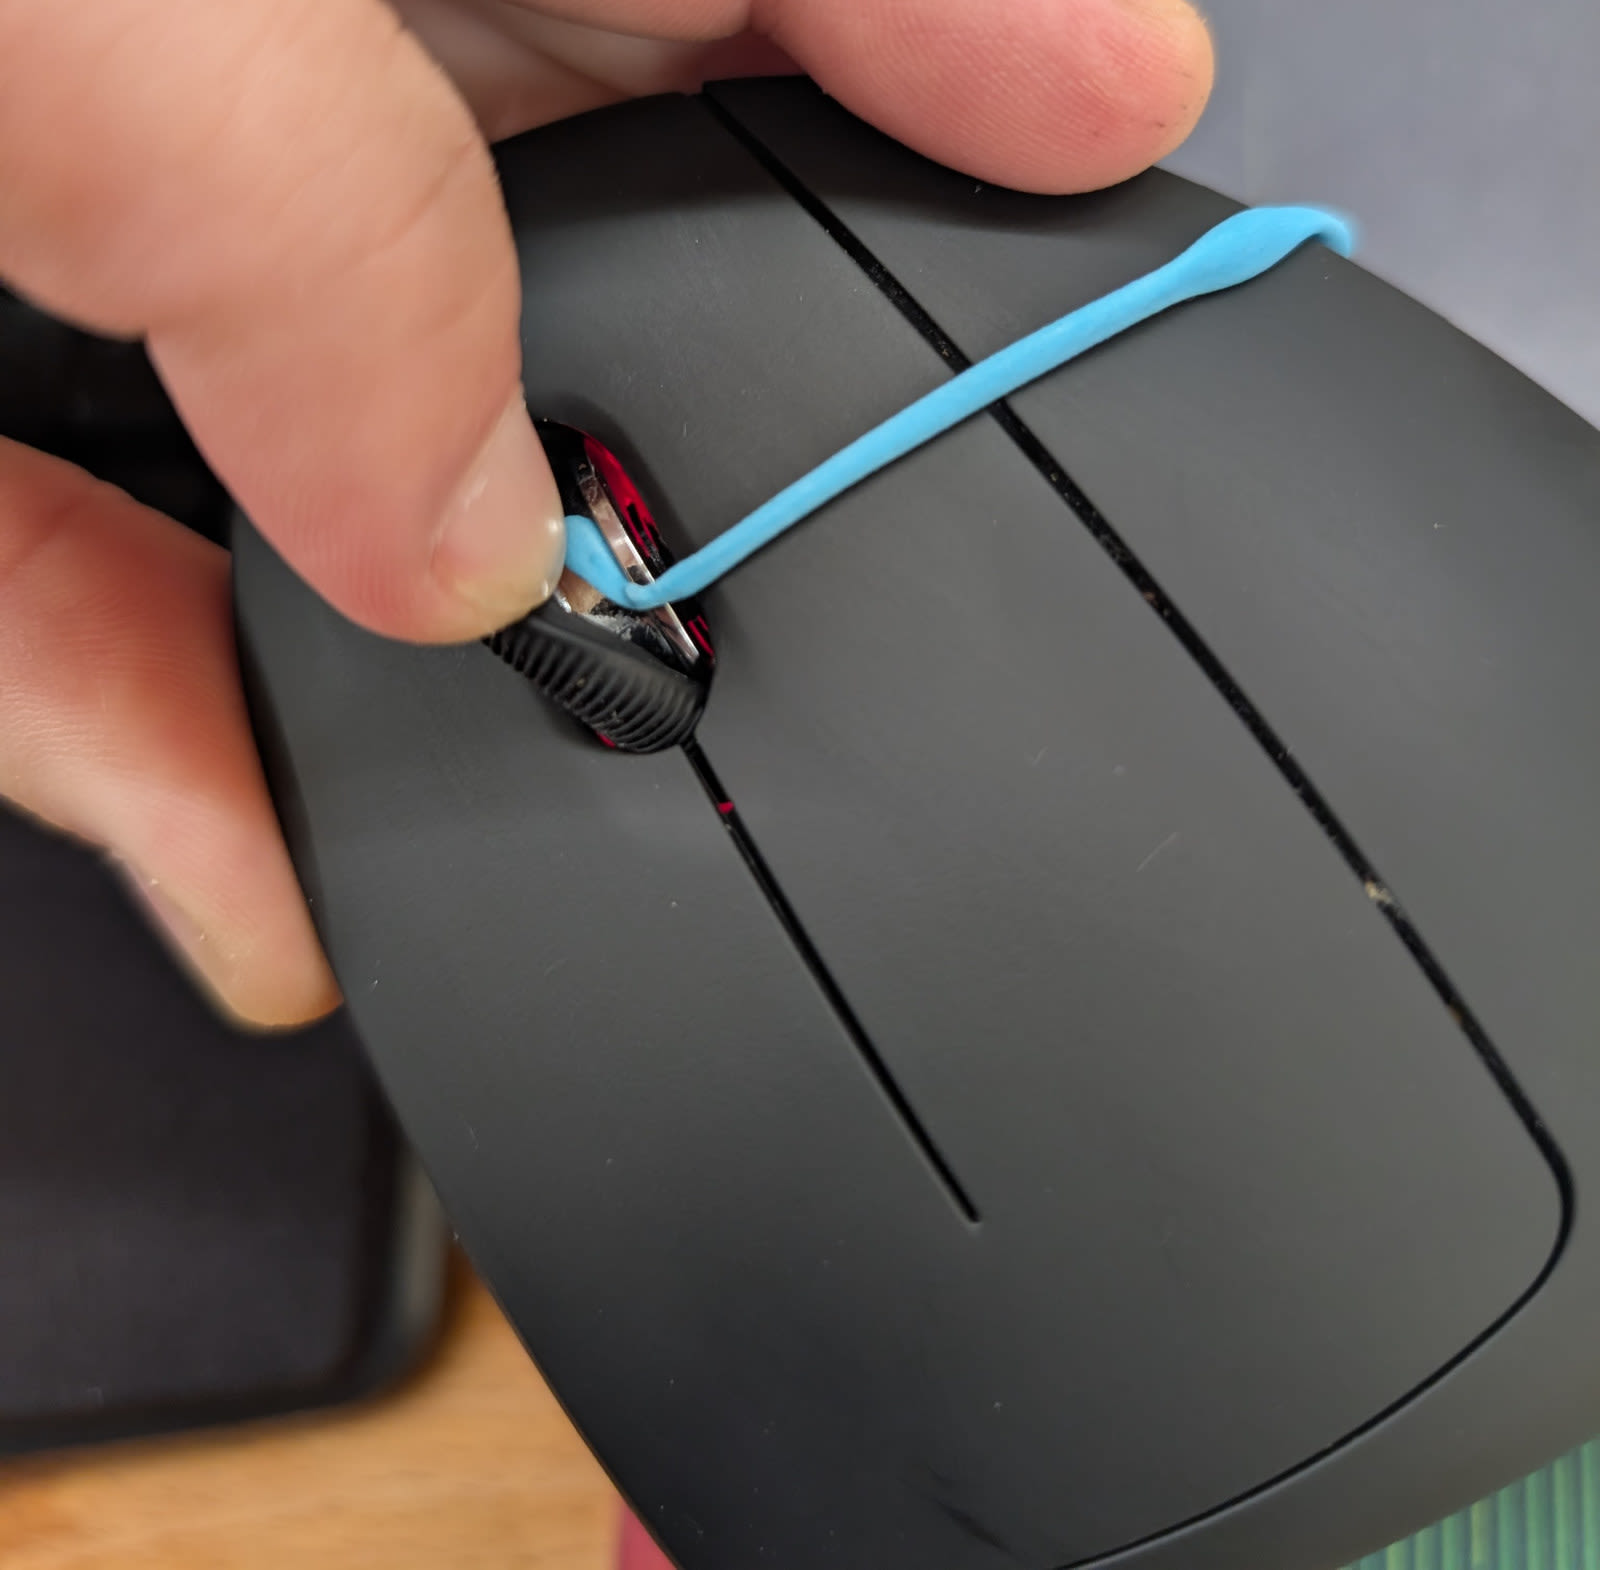
After I got the putty all the way around, I needed to use a pen to push all of it to the center of the channel. Then, I let the rubber fall back down and aggressively pushed down on it while turning the wheel for a few seconds.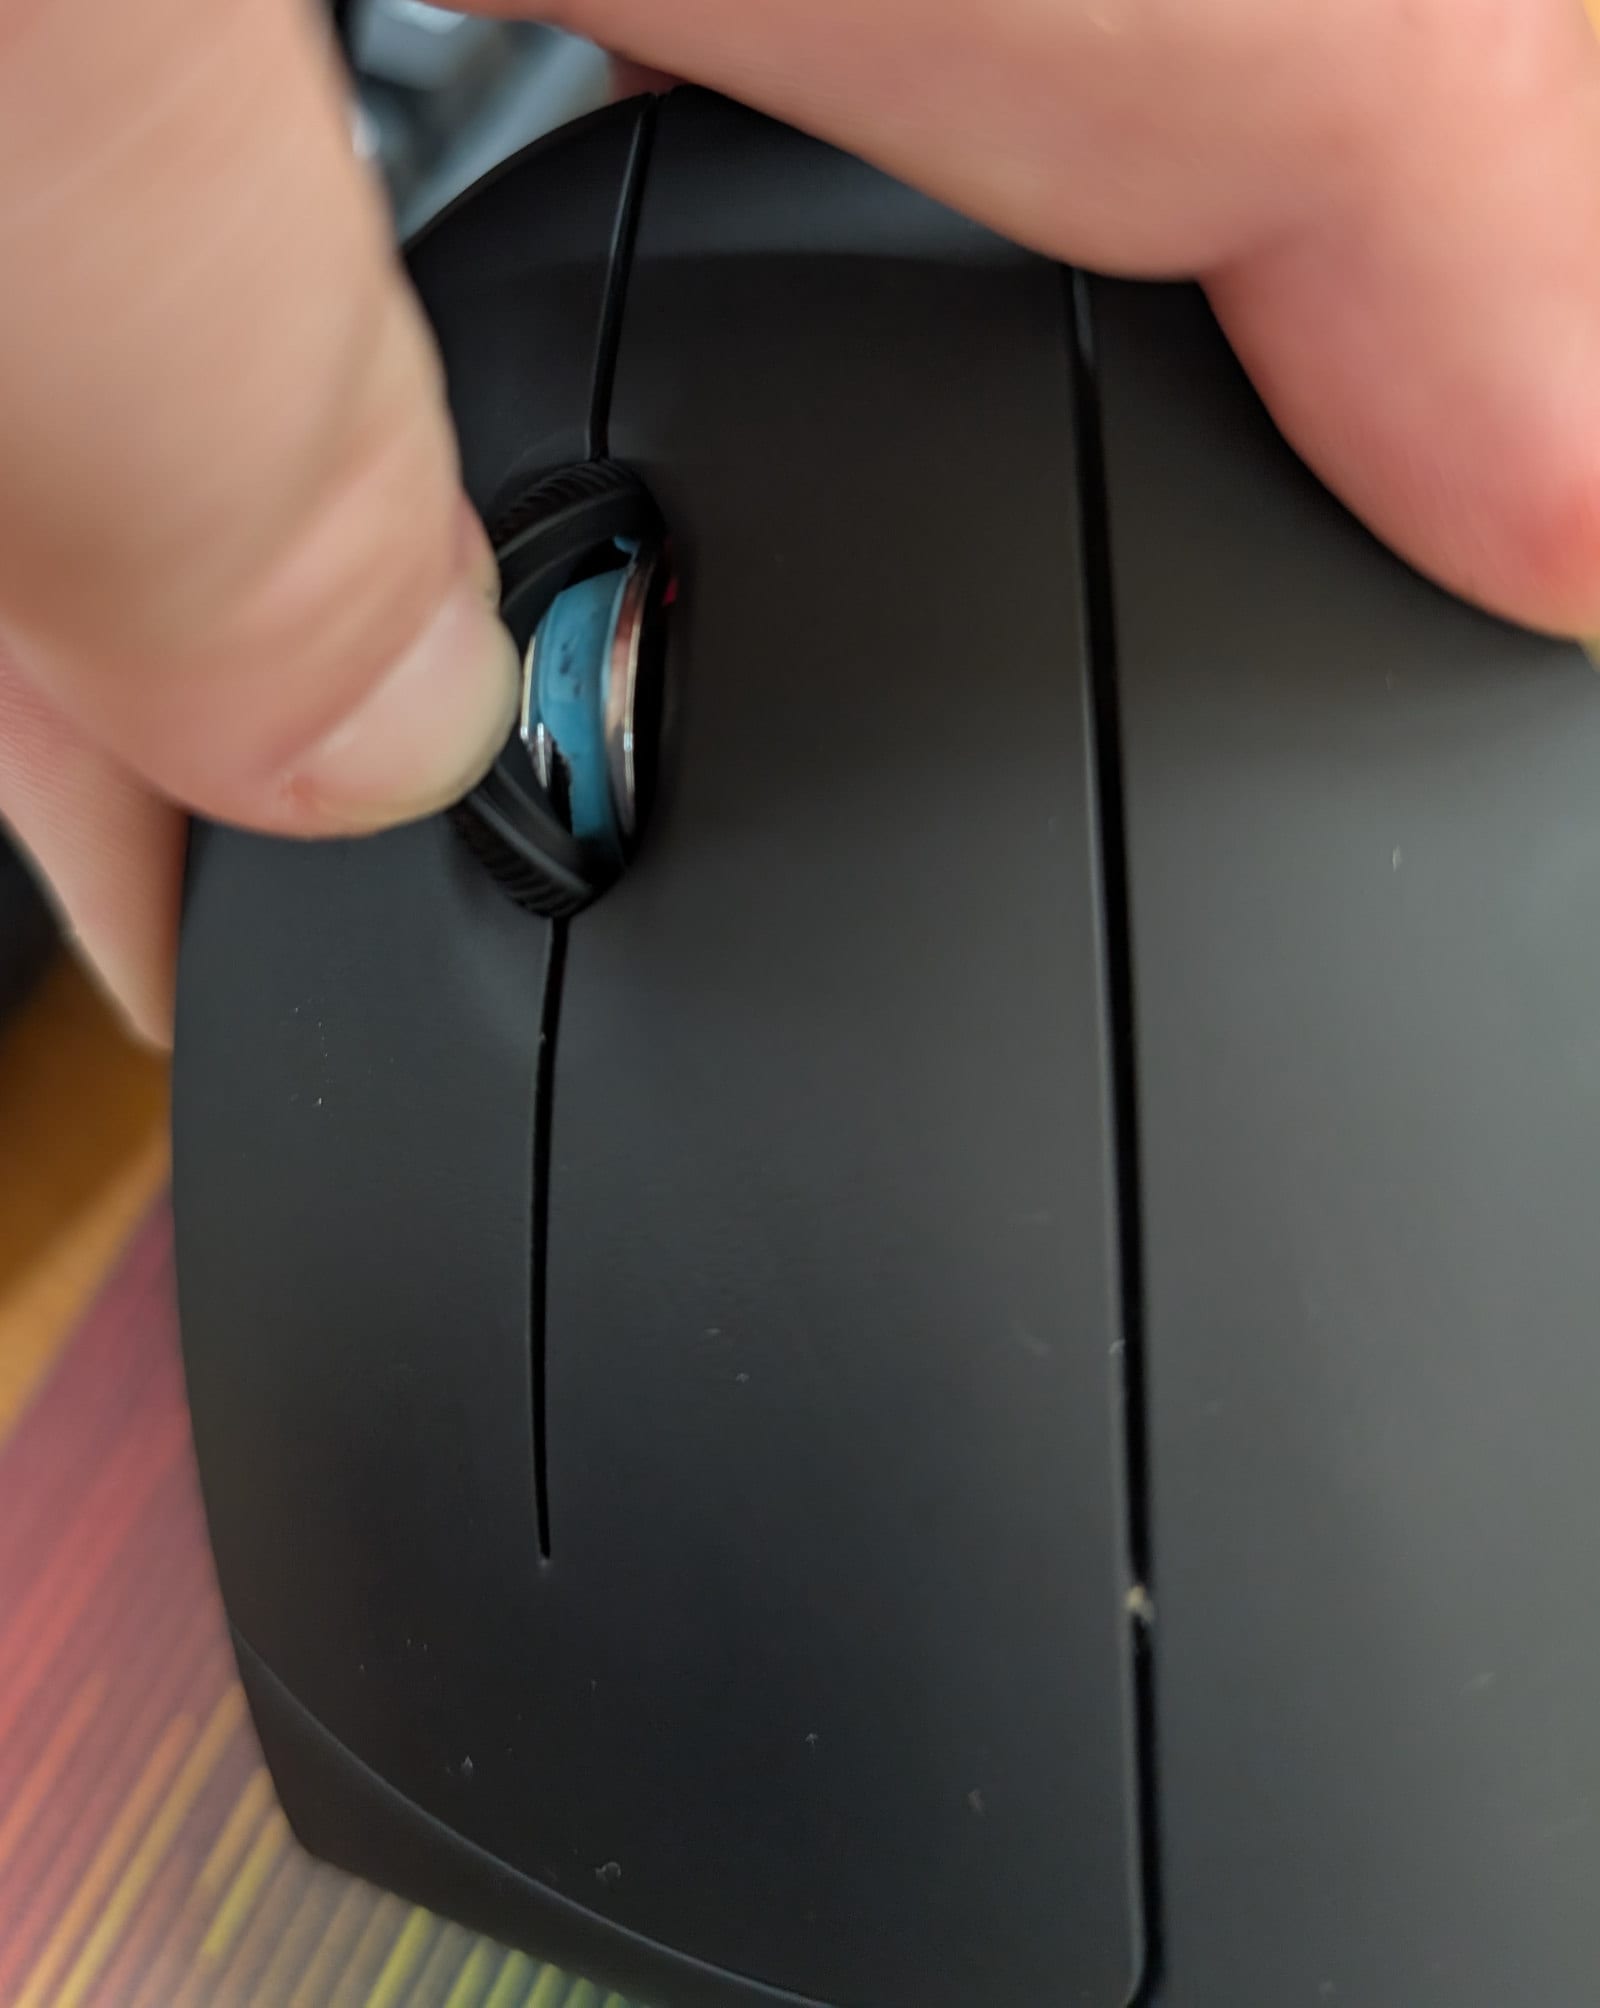
Results
After doing this, the wheel immediately become perfectly responsive, scrolling every time I moved it even a single tick and with the lightest pressure I can apply.
I’ll revisit this over time, but since the original mouse inexplicably has nothing to increase friction in the wheel, I expect that adding an adhesive like this will solve the problem permanently and save me tens of dollars over the coming years.
I like this mouse specifically because it’s wired. If you like wireless mice there are a lot more good options10. ↩
This is almost-certainly cheaper if you buy it in-person at a hardware store. I linked the brand I used but I don’t think it matters. ↩
I swear I’m not an AI. ↩
https://x.com/ohabryka/status/1951723846685634709
https://www.mayoclinic.org/diseases-conditions/carpal-tunnel-syndrome/symptoms-causes/syc-20355603 - “Carpal tunnel syndrome - Symptoms and causes - Mayo Clinic”
https://www.amazon.com/dp/B00FPAVUHC - “Amazon.com: Anker USB Wired Vertical Mouse, Ergonomic Design Mouse for Computer and Laptop, 5 Buttons, 1000/1600 DPI, Optical Technology, USB Corded - Black : Electronics”
https://photos.app.goo.gl/7xFDrSvEJHtGGU2N6 - “Shared album - Brendan Long - Google Photos”
https://www.reddit.com/r/MemeRestoration/comments/bltwi7/request_by_ulollennox_is_it_too_much_to_ask_for/
https://www.amazon.com/Blue-Reusable-Adhesive-Putty-1-Ounce/dp/B005LRTUQ2 - “Amazon.com: DAP Blue Stik Reusable Adhesive Putty-1 Ounce, 1 Pack : Office Products”
https://www.amazon.com/s?k=wireless+vertical+mouse - “Amazon.com : wireless vertical mouse”